How to Activate and Inoculate Biochar
How do I activate and inoculate biochar?
There are four main methods
- Soak the biochar in a dilute solution of liquid fertiliser for 1-3 days before use.
- Mix the biochar with compost – leave it to stand for 6-12 weeks
- Mix the biochar into the soil, leave it at least 3, preferably six months before planting
- Add the biochar to your green waste and compost for 3-18 months – add the biochar compost to the soil
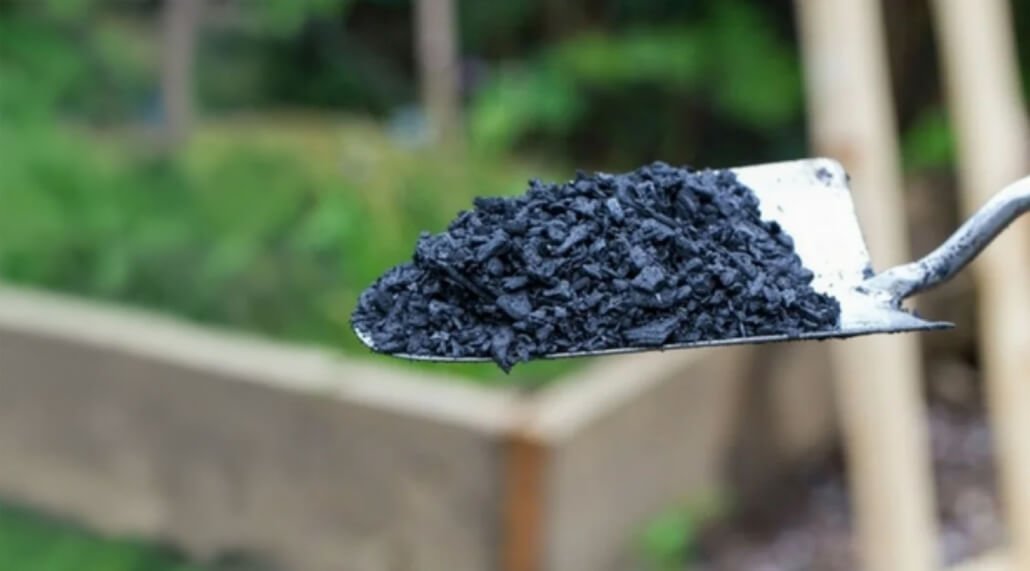
Method 4 has always been the SoilFixer recommended process. We make our Biochar Super Compost (SF60) this way using our biochar compost humification agent (CHA).
Why does biochar need activating?
Think of biochar as a dry ‘sponge’ – it wants to (and needs to!) absorb water and plant nutrients. Once done, soil microbes will associate with the biochar and begin working to transfer nutrients to the plant roots.
If you put raw biochar in your soil, it will take up water and nutrients from the soil until it is full. This can take anywhere from 3 to 6 months. During this time, the plant’s roots are competing with biochar and it can be detrimental to plant growth. We call this the biochar lag period.
You can quickly activate biochar by soaking it in a liquid feed – see below.
Note: if you prefer to buy ready to use, activated biochar – please look at our SF60, Biochar Super Compost
Why does biochar need inoculating with microbes?
Once the ‘sponge’ is full of water and nutrients, it is potentially a safe home for beneficial soil microbes. The walls of the biochar protect against attack. The ‘sponge’ has lots of areas full of nutrients. The microbes live in and close to the biochar. forming symbiotic relationships with plant roots and exchanging nutrients (NPKs) for sugar (which the plants make via photosynthesis).
A number of biochar producers focus on biochar properties like its ability to absorb nutrients. Absorption increases with surface area, hence they focus on making ultra-fine powders. Our testing leads us to believe lots of “biological sized pores” are the defining feature of biochar that works well and biochars that do not. This is why we only use wood biochar. We grade it all into fine granules of less than 8mm to maximize the biological properties.
How do bacteria get into the biochar pores?
Bacteria have no legs. They can be carried in flowing water. Getting them into the biochar can take 3-6 months, or you can inoculate the biochar with a range of soil microbes. The simplest and easiest method of inoculation is to put your biochar into the compost heap and use the resulting biochar super compost.
Table of activation and inoculation options for biochar
| Soak | Slurry | Soil | Make Compost | Super Compost | |
| Tools | Bucket, watering can | Bucket, watering can | Soil, raised bed | Compost bin | None |
| Materials | Bag of biochar, liquid feed (tomato, Miracle-Gro ™, comfrey tea, seaweed, etc) | Compost, biochar | Soil, biochar | Green waste, biochar or CHA | Compost waste, CHA or biochar |
| How | Drop biochar into the bucket. Dilute liquid feed as recommended in the watering can. Add diluted liquid feed into the bucket. Leave it to soak for 3 hours, preferably 24 hours. Dig biochar into soil | Add 10 cm (3 inches) layer of compost into wheelbarrow. Add a bucket of water. Mix to create a slurry. Add a bag of biochar, mix well into the slurry. Leave 24 hours, preferably 3 days. | Dig biochar into soil. Ratio 2-5Kg/m2 | Sprinkle CHA onto green waste | Buy SF60 |
| Benefits | |||||
| Absorbs water | yes | yes | yes | yes | |
| Absorbs Nutrients | yes | yes | yes | yes | |
| Inoculates with microbes | no | yes | yes | yes | |
| Timeframe | 1 day | 1 day | 3-6 months | 3-12 months |
Which nutrient feed should I use with raw biochar?
This is down to personal choice. It can be an organic feed such as liquid comfrey, seaweed, compost slurry or a liquid feed commercially available such as tomato feed, MiracleGro ™, etc.
Should I add mycorrhizal fungi (MF, AMF)?
The association of plant roots with mycorrhizal fungi happens with an estimated 80% of all plant species. This symbiotic relationship is seen as essential to good healthy plant growth. Opinions are split on how best to achieve this. Some biochar vendors are adamant about the need to add AMF powders and solutions to biochar. Others are just as adamant that adding AMF is not needed. We see this as a more nuanced approach based on your situation.
The benefits of applying AMF relate to how AMF work in the soil. Healthy soils already have AMF spores present in the soil. When plants germinate, they release hormones that ‘activate’ the AMF to start growing. Hence, most soils really do not need additional AMF spores.
If your soil is very poor and has not seen any plant growth for years, adding AMF spores would seem sensible.
However, mycorrhizal fungi are best used at the point of planting as they attach to the roots of the plants. Dispersing a tiny quantity of AMF spores into a large volume of soil may not provide any noticeable results as the roots might not come into contact with the dispersed spores.
There are many professional growing situations where the arguments around ‘risk and certainty’ change how AMF could be used.
At SoilFixer, we do not routinely add AMF to our products like Biochar Super Compost (SF60). But our Biochar Super Compost has been through the composting process so is rich in all sorts of microbes found in soil.

